Importing data from Excel
Preparation: Matching excel columns with the Matrix items fields
As the final goal is to create some Matrix items based on the excel content, the first thing to do is to create the right structure of your category which will be filled in.
Corresponding fields need to be created to make sure that each column needed for the import has a target field for the import. It can be any field such as: text field, check box, dropdown,... More info here: Input fields.
Step 1: Enable feature
In order to import data from Excel, you first have to enable this feature in the admin client:
Project Settings → Advanced features:

Step 2: Prepare Excel file
Each row of the excel will be imported as one item.
The different columns will be mapped to the different fields (e.g. description)
Make sure Excel is a basic excel file with no merged cells, macros, fonts (even hidden ones) etc.
In general we can import the same data using the same format as it is exported from Matrix. So if you are unsure how to import something, create and example item and export it using the Excel report. Sometimes you'll need to do some excel gymnastics to get the data into the right format. E.g. if you have a Excel date column you need to convert it to a simple text field YYYY/M/D, e.g. using a formula like this;
=YEAR(G2) & "/"& MONTH(G2)& "/" & DAY(G2)Step 3: Importing the items
When your Excel file is ready, go to the folder in which you want to import your data and click on "Import Excel File".
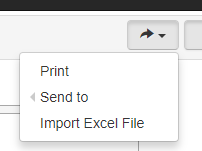
Then either drag-and-drop or select the file you wish to import.

Next, select which worksheet in the selected Excel you would like to import

Once you selected the worksheet, the data in this worksheet will be converted to a table which allows you to select which rows need to be converted into items. Note that you don't want to include the ones with a title, but only the ones with actual content.

Afterwards, you can assign a field, that is present in the item type to which this data will be converted, to a column. For example, for a REQ item, this can be a title or a description. For a RISK it can be a cause, effect, probability, severity, etc.
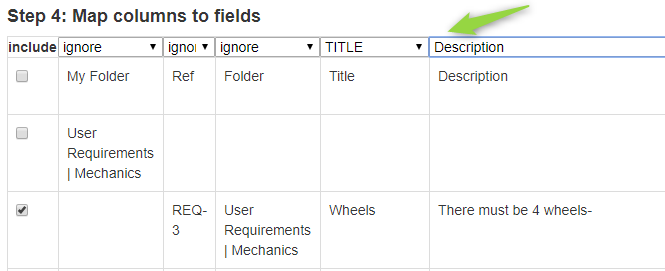
When clicking on next, the selected rows will be converted into items and the content of the assigned columns will be added to the selected fields.
Filling checkboxes in Matrix
If you have checkboxes in Matrix, the Excel need to contain the values true or false (or x and nothing) to fill in checked or unchecked data in Matrix.
Setting labels in Matrix
If you have labels in Matrix, the excel need to contain the values true or x or 1 to to set the label in Matrix.
Setting dropdowns in Matrix
If you have a dropdown in Matrix to fill in with the data contained in a column of the excel, the option should be the same than in the actual Matrix dropdown.
If you have multiple options available, a "|" needs to separate each selected options in the excel file.
Warning: if you entered an empty line in your drop down options, the import will be stuck. Make sure all empty lines are removed before.
Note: In the case of multiple selection possible, don't forget to change the maximum number of selected items to more than 1 (the default) in the dropdown field settings in the administration (see more info: Dropdowns)
Note: if it's a "user dropdown", only the user id (exact match) should be entered in the excel to be recognized in the import
Handling Folders
If you want to create folders while importing items you have two possibilities:
- creating a flat list of folders with a couple of items inside
- creating a more complex hierarchy of folders
Flat folder lists
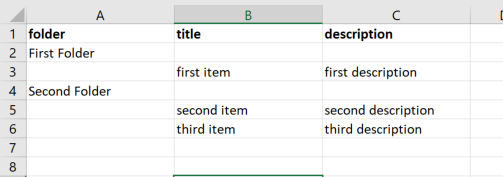
| To create the below with two folders | you need to prepare you Excel like this |
|---|---|
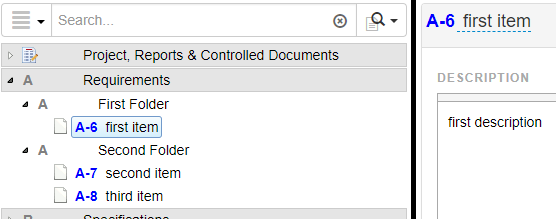 |
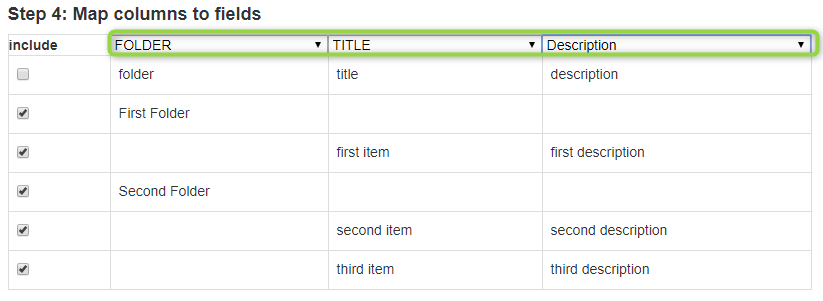
Add an extra column for the folder name Create an extra line for each folder |
Once done you need to map the columns as follows: map the column with the folder names to FOLDER
Items in hierarchy
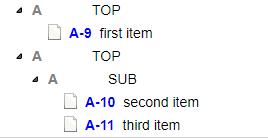
| To create the below with two folders | you need to prepare you Excel like this |
|---|---|
|
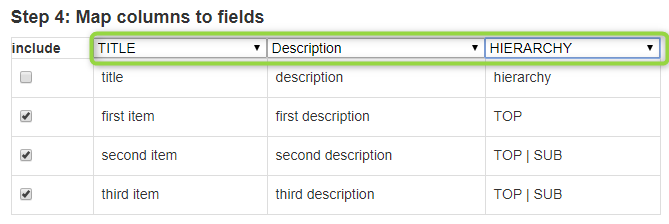
Create a extra column for the hierarchy Enter a | separated list of folders for each item |
Once done you need to map the columns as follows: map the column with the folder names to HIERARCHY
Handling links between items to import
More info in FAQ How can I import data from excel with links between items?
Handling Test Cases
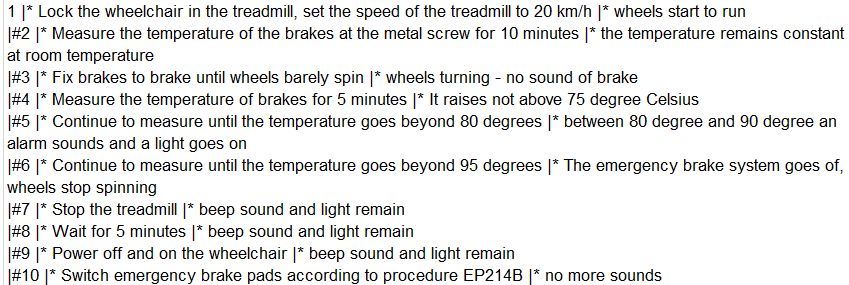
The best for test cases is to have an excel where each tab is one test case with the rows containing the test steps, see here: Importing tests from Excel
If your excel has one line per test case, the test case steps (from the test table) need to be in a specific format:
- for each test step: step | action | expected result (step is a the row number, starting with 1, afterwards separated by | are the other columns of the test table).
- between each row, use a |# as a separator
Here an example of one cell in excel with a complete test table
