Data Entry
Each item consists out of pre-configured input fields depending of the item category. To edit an item just click in the field you want to modify. The editor will be activated. The following field types exist: (to See how to configure each of them, see input fields settings)
Field Name | Example Rendering / Usage |
|---|---|
Rich Text Editor An editor allowing to enter formatted text. | For the legacy editor see Data Entry The text editor is always 18 cm wide, so when printing the printed content will look similar to what you can see on the screen. When adding images they will be automatically scaled to fit on a printed page. When you click inside a text editor, a toolbar becomes visible:  Formatting Text You can type your text and style it using the buttons or keyboard shortcuts. Drag and drop support
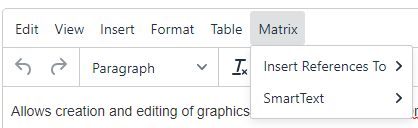 Smart Text Smart links (Insert References To) DrawIO The editor support inserting and editing of draw.io diagrams: 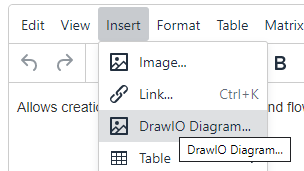 Once you inserted a diagram you edit it in the draw.io editor. |
References control (Down Traces) | Using the references control you can enter traces to items which are derived from the item you are editing (down traces), e.g. from requirements to specification: 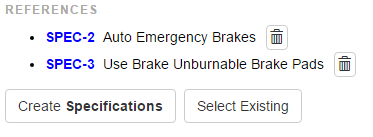 To add references: click on the Create ... button, to select already existing item click on the Select button. More information about traces you can find at Traces and Traceability |
Text Entry Line |  |
Section with explanation Allows to add a "Title" between two fields | This might be useful to introduce a checkbox for example: 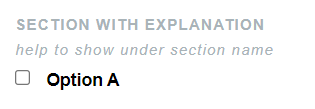 |
User Selection |  |
Date Picker | The date picker shows the current date in grey, the selected date in blue. 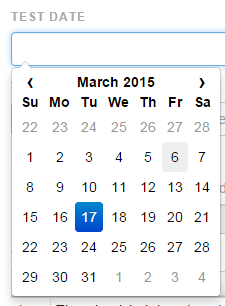 |
Plain Text Editor | 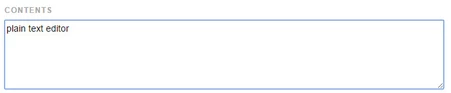 |
File Manager |  |
Dropdown | 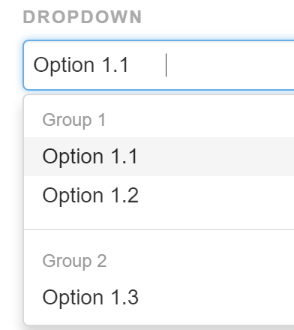 |
Table Controls |
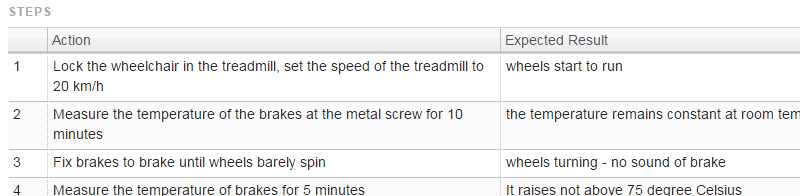
Smart links Test Results: |
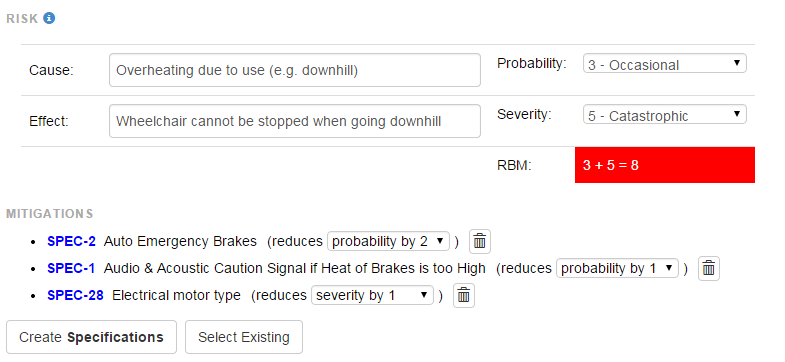
Risk Control |
|
Checkbox |  |
Cross project links |  |
Uplink information These show information about the upstream references, these can be used for example to mark items as risk controls if they have are referenced as risk measure. | The rendering option has to be chosen from the dropdown and can be adapted in the advanced button (json) if needed.  |
Gate Gate elements allow you lock fields in an item above or below the gate, depending on its approval. | 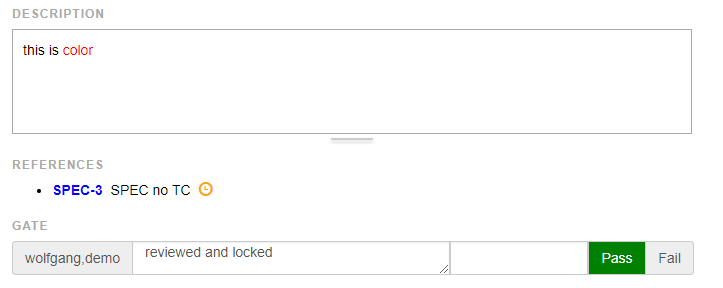 Example of a locking gate. The gate passed and is configured to disable the fields above. It is also configured to require to enter a password in order to pass. This and the comment fields are optional. |
Tasks / Link Control This control allows you insert links to external web sites and bug tracking systems. | To add links you can either drag and drop them inside the control  or use the item's tool menu (Jira or Link plugin to enable): 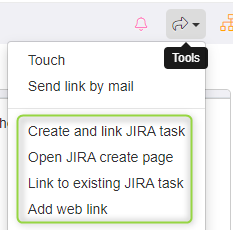 |
(Design) Review Table The review table allows your team to record design reviews for some selected items. | After selecting the items to be reviewed and the reviewers, a table shows all items and passed fail columns for the reviewers. Reviewers can also leave comments inside the reviewed items and compare them against previously reviewed versions. 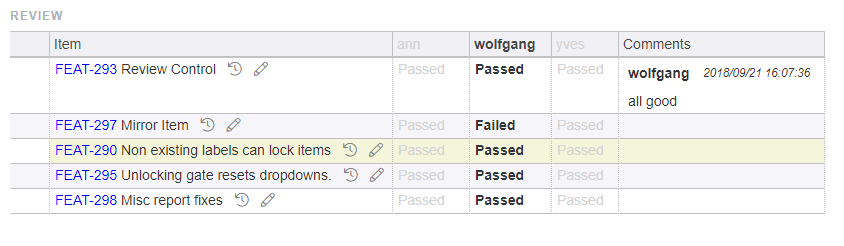 |