
Add initial content to text fields of items
You have the option of adding pre-configured content to stand alone text fields, and/or text fields within tables. For instance, if you want to include the same checklist for each item or provide uniform instructions, you can easily edit and set this content in the ‘Advanced Settings’ for the respective field. Additionally, you have the flexibility to add graphics as initial content, enhancing the visual representation of your entries.
Below you can find instructions for the following scenarios:
Initial Content - Text field
If you want to add initial content to a text field, follow these instructions:
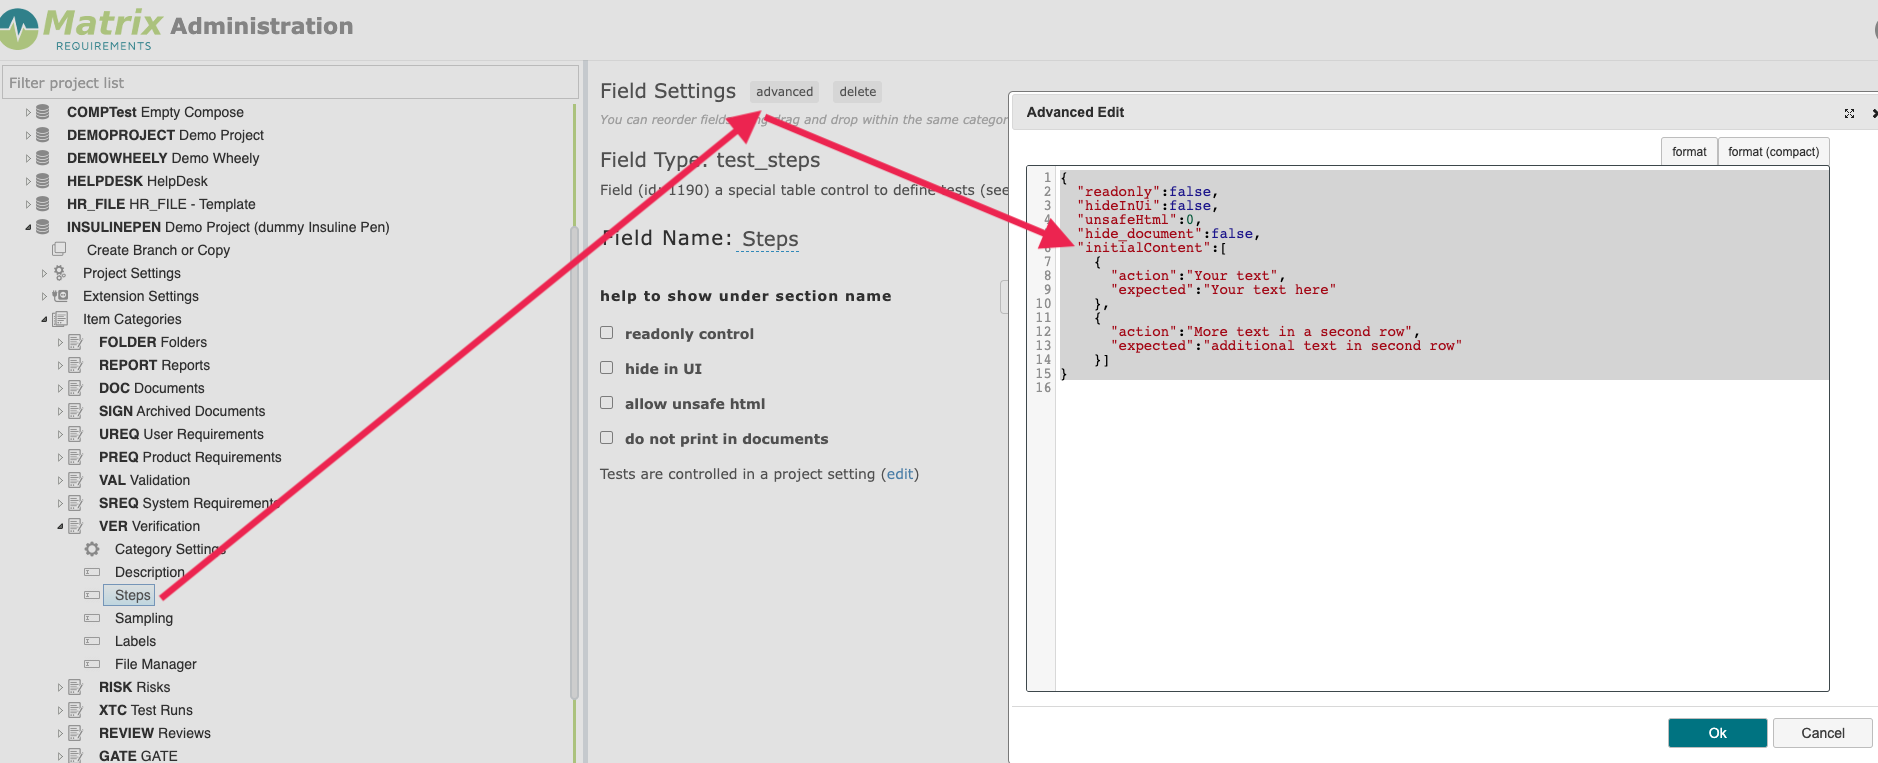
Navigate to Server Administration → Project → Item Category → Text Field (the one you’d like to add content to)
Go to Advanced Settings
Enter the following line of code:
"initialContent":"Insert desired text here"If you have a longer text block and want to add breaks to it, you can add the attribute <br/> to force a page break. For example:
"initialContent":"Insert desired text here and add <br/>to force a page break"Here is an example of what it might look like in the advanced settings:

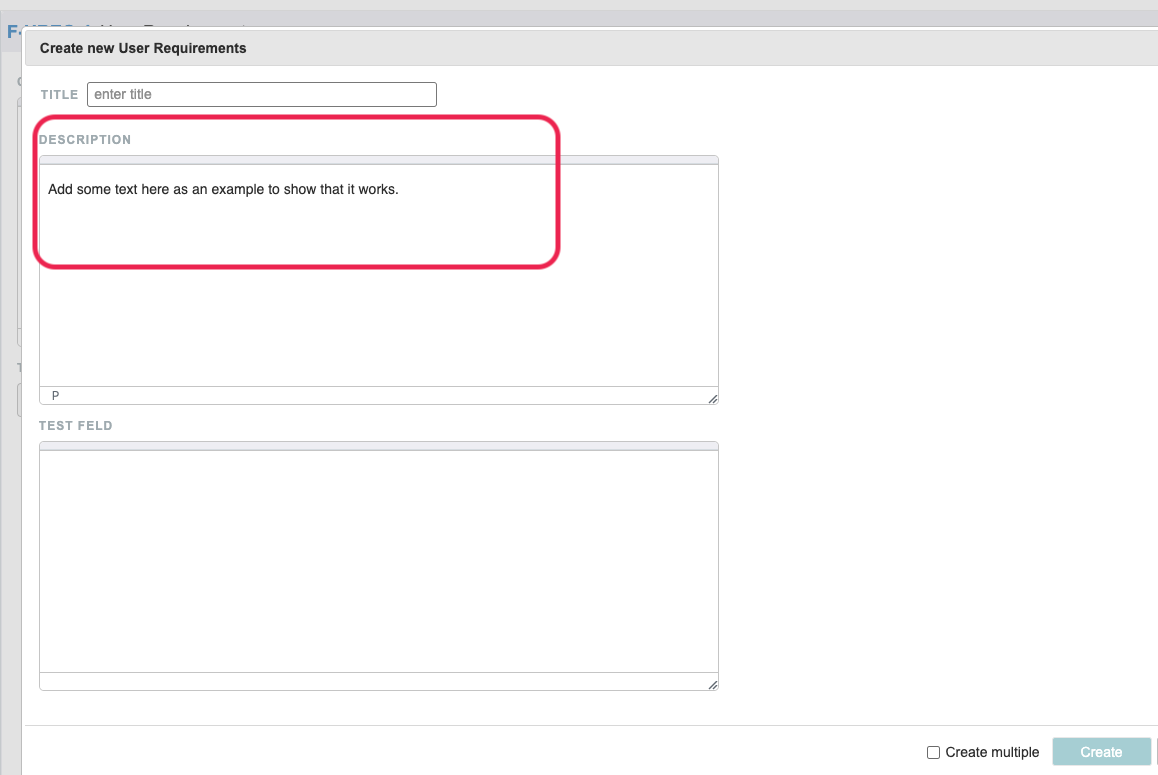
This is what it will then look like when you create a new item. As you can see, the text we defined in the advanced settings is already populated when you create a new item:
Initial content - Table
If you want to add initial content to a text field in a steplist table, follow these instructions:
Navigate to Server Administration → Project → Item Category → Table Field (the one you’d like to add content to)
Go to Advanced Settings
Add the following line of code:
"initialContent":[
{"insert id of column":"Insert desired text here"},   <- equals row 1
{"insert id of column":"Insert desired text here"}    <- equals row 2...
]
This will add initial content to the column matching the id in the code. Every line of code in the braces equals a table row.
If you want to add content to more than one column per row you’d need to set up the code snippet as follows:
"initialContent": [
{"insert id of column":"Insert desired text here",
"insert id of additional column":"Insert desired text here"},  <- equals row 1
{"insert id of column":"Insert desired text here",
"insert id of additional column":"Insert desired text here"}   <- equals row 2...
]
If you’d like to add a page break in one or more of the sections, follow the instructions provided above.
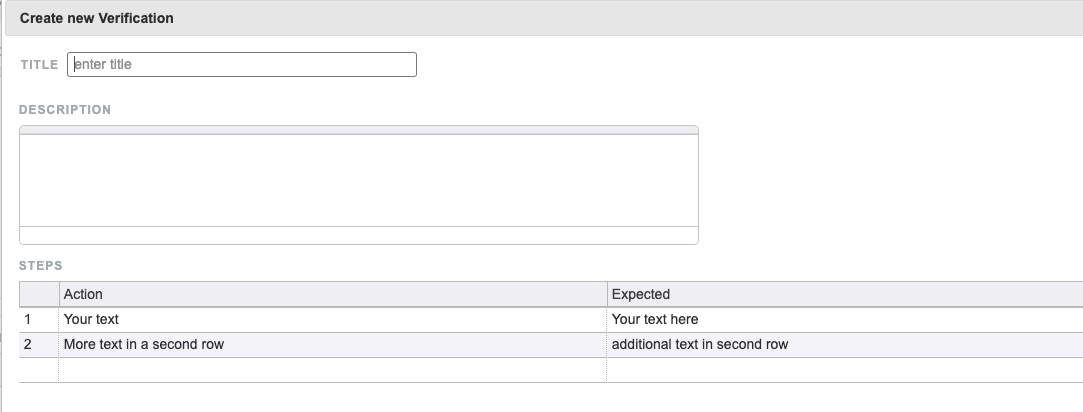
Here you can find an example of adding initial content to two columns and across two rows:
When creating a new item the table then looks like this:
Initial content - Image in a text box or table
If you want to add an image as initial content to a text field or in a steplist table, follow these instructions:
To make adding an image as initial content possible, you’ll need to follow a few more steps before you can proceed with the admin configuration.
As a first step add the image you’d like to use to a rich text field and save the item.
In the text box, click on View → Source Code
In the source code copy the <img> tag and it’s contents, it will look like this: (make sure you exclude data-filename) This is the link to the image on the server.

Navigate to Server Administration → Project → Item Category → Table/ Text Field (the one you’d like to add content to)
Go to Advanced Settings
Add the following line of code:
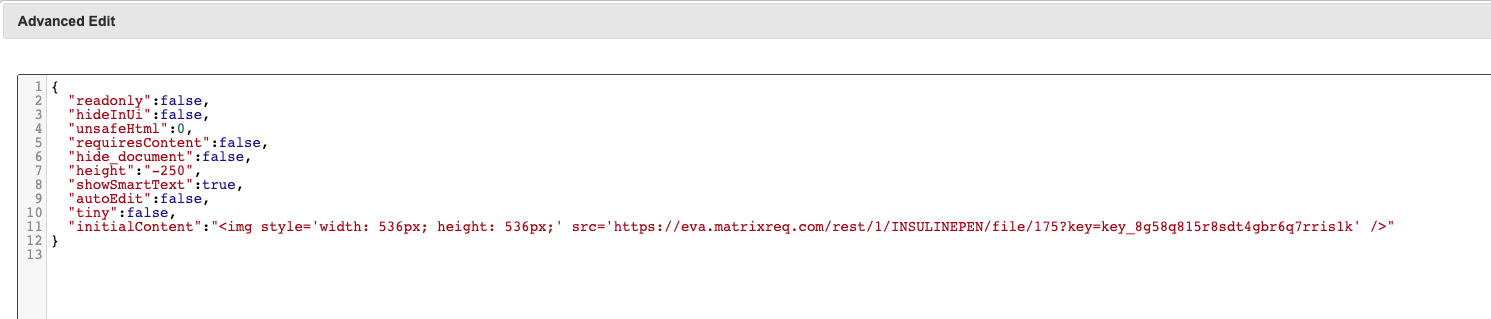
"initialContent":"add <img> tag here"Other than with the initial text content, we need to make some adjustments in the aforementioned code:
We need to replace the quotation marks in the pasted line with single quotation marks. Additionally we need to add the following at the end of the code line to close the tag: />"
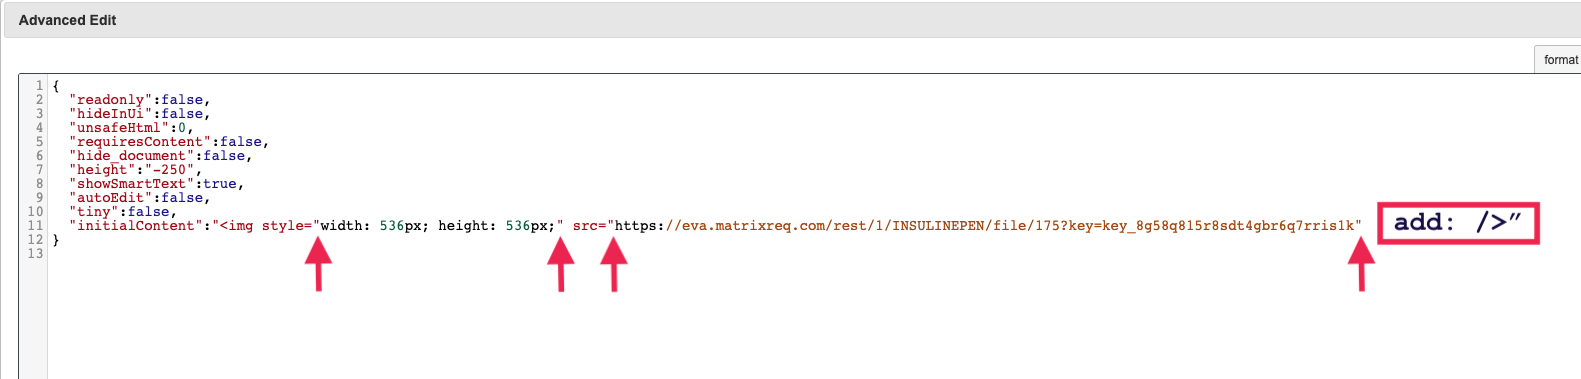
So a reworked link would then look like this:
After you saved this you can delete the picture from the text box, where we copied the link to the server. Even if the image is removed the server link will remain active.
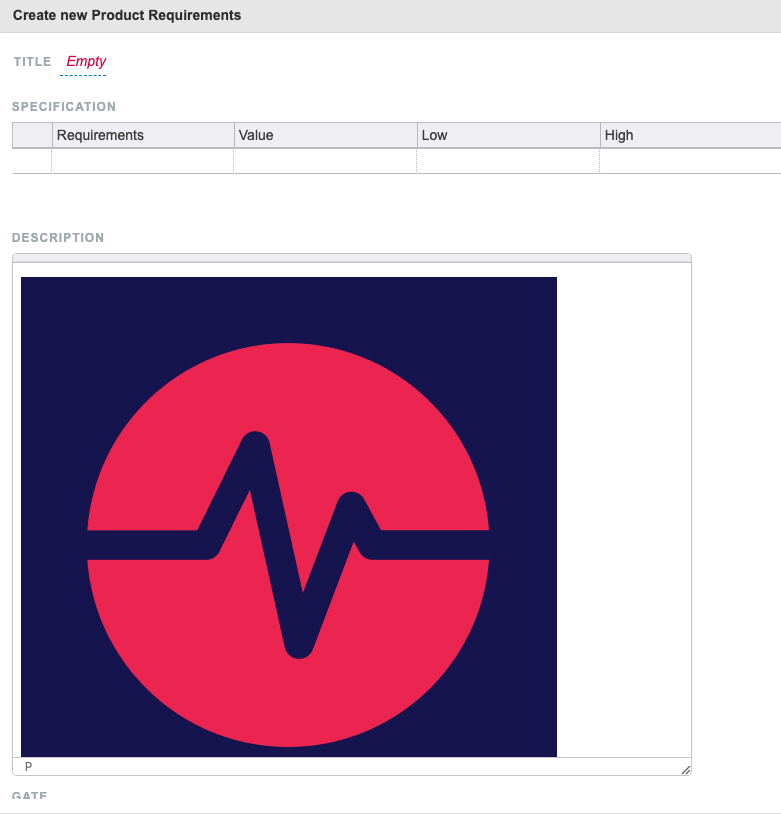
When creating a new item, the image content will look like this:
Initial content - Pre-selected dropdown
If you want to add initial content to a standalone dropdown field or a dropdown field in a steplist table, follow these instructions:
Navigate to Server Administration → Project → Item Category → Dropdown Field
Go to Advanced Settings
Add the following line of code:
- CODE
"initialContent":"add dropdown id(s) of choice"
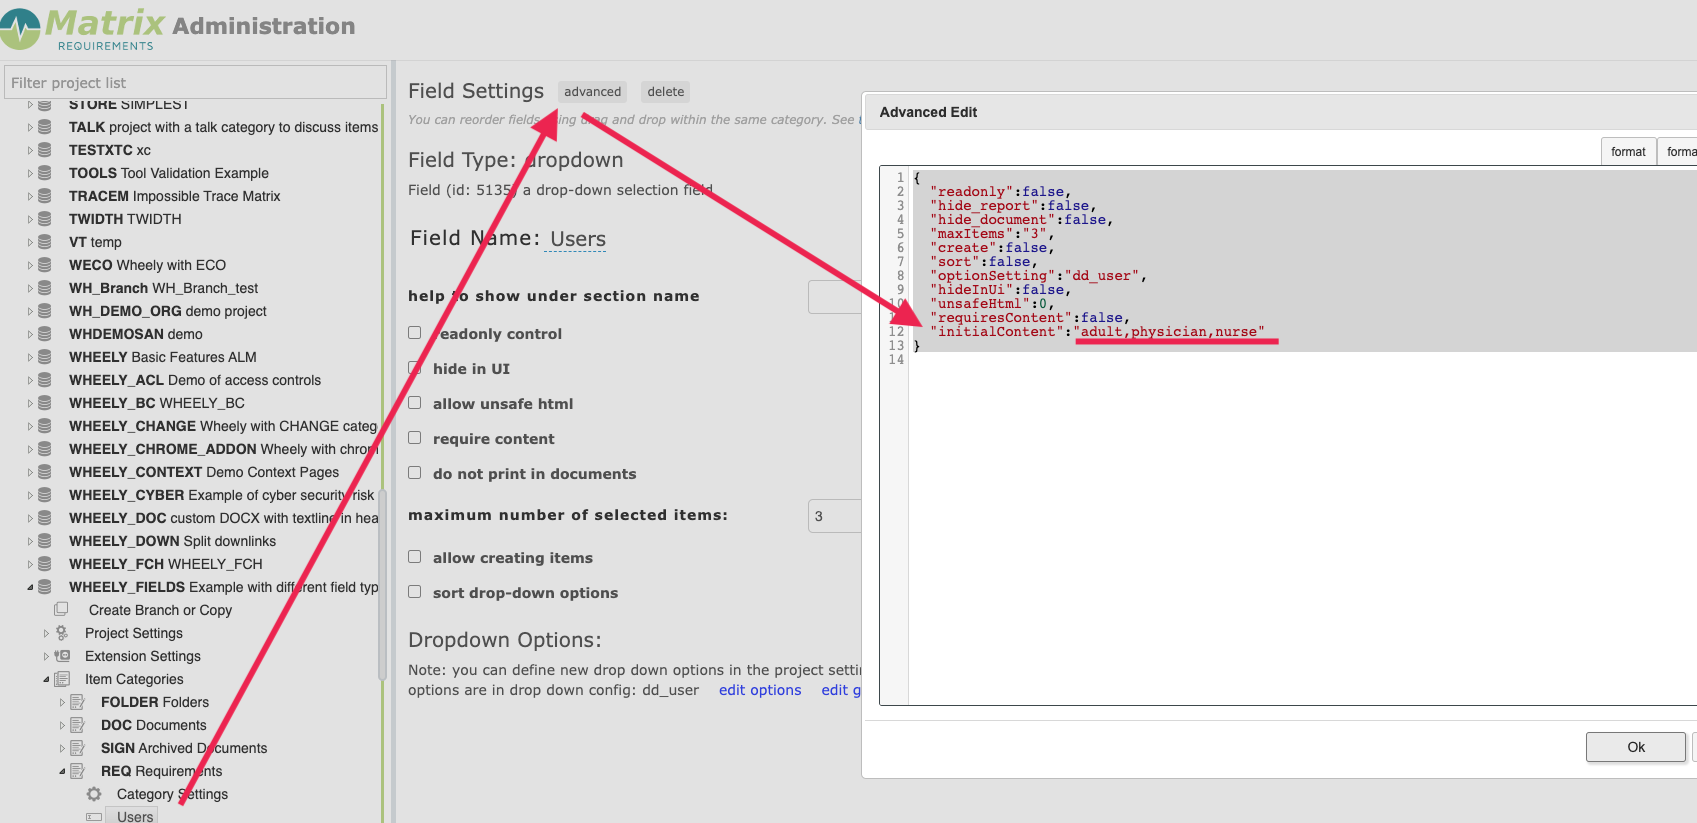
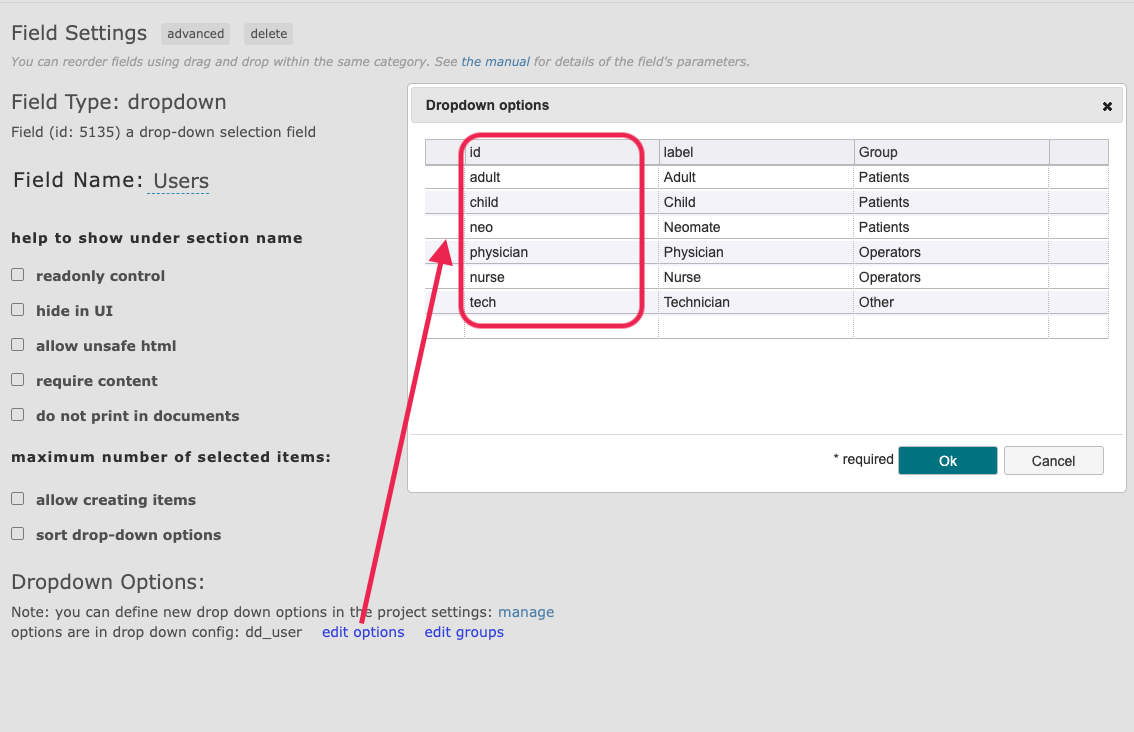
The dropdown ids can be found in the dropdown configuration. See this as an example:
This can also be added to a table, if the table has a dropdown field. To do this you’d follow the guidelines outlined in the instructions how to add initial content to a table and instead of text you’d add the respective dropdown id(s).