
Merging Changes Back
Merging changes back happens in 6 steps
inside the mainline project selecting the branch
selecting the content changes from the branch to go back into the mainline
selecting the traceability change to go into the mainline
selecting the updates of the folder structure in the mainline
executing the merge
reviewing the merge results
1 Selecting the Branch
Open the mainline and project in the ‘normal’ client. Under Tools > AUDIT you find the merge tools.
You first need to select the branch which should be merged back.
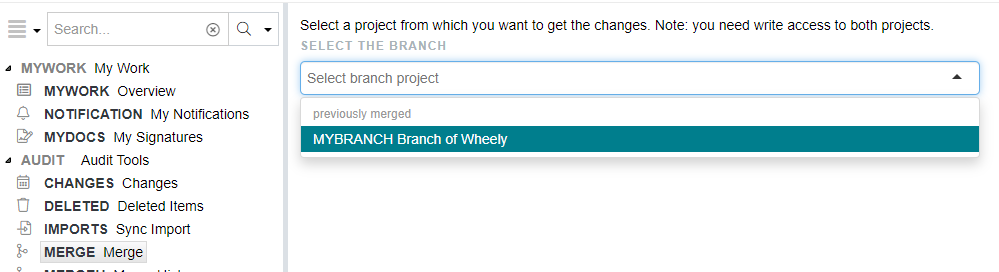
Once you selected it, you see some basic information about the branch in the top:

2 Selecting the content changes
Items can be created, changed or deleted in either the mainline or the branch.
You will need to decide which changes should be merged back. By default all non-conflicting changes are merged back from the branch to the mainline.
For example in the image below 3 changes are pretty straight forward to decide as there is no conflict. For the last option you need to decide who wins, the mainline or the branch.
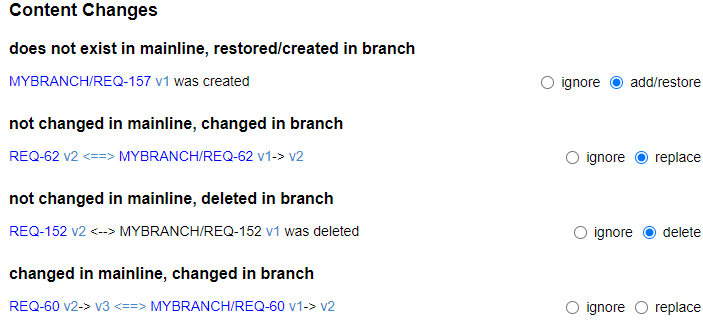
Note: the option on the right will always result in a change to the mainline. The option on the left will not change the mainline, but instead Matrix will remember that there is no need to merge this change back in future, unless either one changes (in that case you will be asked again).
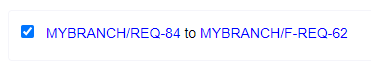
In case you need to compare or review the changes you can click on (1) to get a 3 way comparison (common ancestor, current mainline, current branch) or (2) to look a one specific revision.

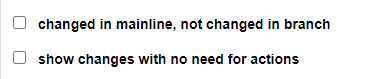
Tip: If you have many changes you can hide the the automatically selected one by clicking

Underneath the list of possible changes might be some other changes which usually don’t need any action, e.g. if you modify an item in the mainline after you branched, you could decide to roll it back to the revision of the branch but normally ou don’t need that.
Once you selected an action for all items you can click on NEXT to proceed to the next step:
3 Merging traceability changes
You can select which traceability changes should be merged, by default it selects all.

Once you click NEXT you proceed to the next step
4 Merging structural changes
If items get moved in the branch you can merge these changes back as well.
Note: it is a good practice not to move items in the branch as it can be difficult to merge the changes back, e.g. if some folders don’t exist anymore in the mainline.
5 Launching the Merge
Once you proceed to the last step, you can click on MERGE to execute the merge. The checkbox underneath the MERGE button allows you to perform the merges even if changes were done in the mainline while preparing the merge (which obviously should be avoided)

6 Merge review
Once the merge is done, and the mainline is updated, the merge History View is loaded.