Custom List of Items
Simple List of Requirements
A list of requirements only requires two items: a LIST which iterates over folders and items and formatters for the item data
Create the List
Go into the PRINT project and create a new LIST item, call it Requirement List
Open the new item and set the following:
Iterator: Children of Folder
UL: We use a regular <ul> tag but without the bullets in front:
<ul style="list-style:none;"></ul>LI: This is just the regular <li> tag
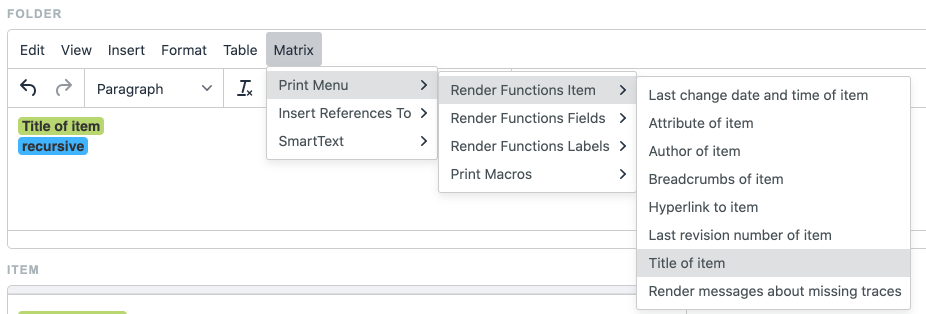
<li></li>Folder: From the Matrix menu add “Print Menu -> Render Functions Item -> Title of Item” and “Print Menu -> Print Macros -> Recurse using iterator”. The latter makes sure that the List will include the subfolders, not just the top level.
The formatting is easier to achieve with the code editor, so after adding the placeholder items open the editor with “View -> Source Code” and make sure it looks like this:
HTML<p class="h2"> <span class="mceNonEditable execPrintFunction" title="\{"renderFunction":"title"}"> Title of item </span> </p> <span class="mceNonEditable execPrintMacro" title="\{"renderFunction":"links"}"> recursive </span>Item: Add Title of Item, then look in the Generics group of the Formatters for the Description Field format. Reference it by adding “FORMAT-9!” (this number might be different for you).

When going out of the edit mode this reference will be resolved to a link and name of the Formatter. Not go into the code editor again to adjust the formatting:
HTML<div class="item"> <p class="h3"> <span class="mceNonEditable execPrintFunction" title="{"renderFunction":"title"}"> Title of item </span> </p> FORMAT-9! </div>The div here is used in the styling later on to create an indent for each item.
Create a new document and add a Custom section to it. Select the Folder of item you want to list and save.
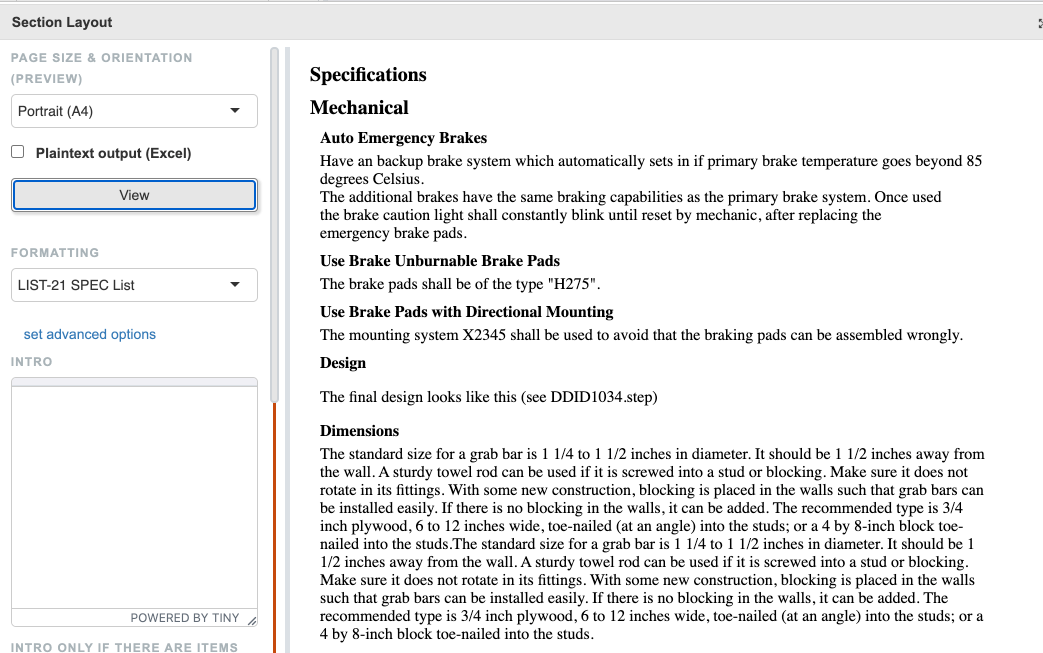
Open the preview window and take a look at the result:

This is still missing the formatting but otherwise looks correct
Open the Administration and go to the project settings of the project
Open the Word / PDF Styling and click on the Customise print styling link
In the dialog that opens add the following CSS styles:
CSSul {margin-left: 0px; padding-left: 0;} li {margin-left: 0px; padding-left: 0;} p.h2 { font-size: 20px; font-weight: bold; margin-bottom: 10px; margin-top: 10px; } li > div.item { margin-left: 10px; } p.h3 { font-weight: bold; margin-bottom: 5px; margin-top: 10px; }Close the dialog and go back to the Document. Make sure to reload the page to load the new styling.
The preview should now look like this: