
Custom cell rendering per category ("Cascading Blocks")
Sometimes you’d like to have a table to list items of different categories, like TC, SPEC, DOC, etc. However, you’d like to have specific output depending on the item category. In my case I want the following:
A table that lists all TC, SPEC, DOC.
DOCs have a label WebReady. If this is true, I want to see a 1990s image banner in the table row to highlight this.
TCs have a design label “TC Approved.” If this is set, I want to see the text “Test Approved.” If it is not set, I want to see the text “Please acquire Test Approval.”
SPECs have a design label “SPEC Approved.” I want similar text as in the TC case above.
Also, include downlinks if any for the item
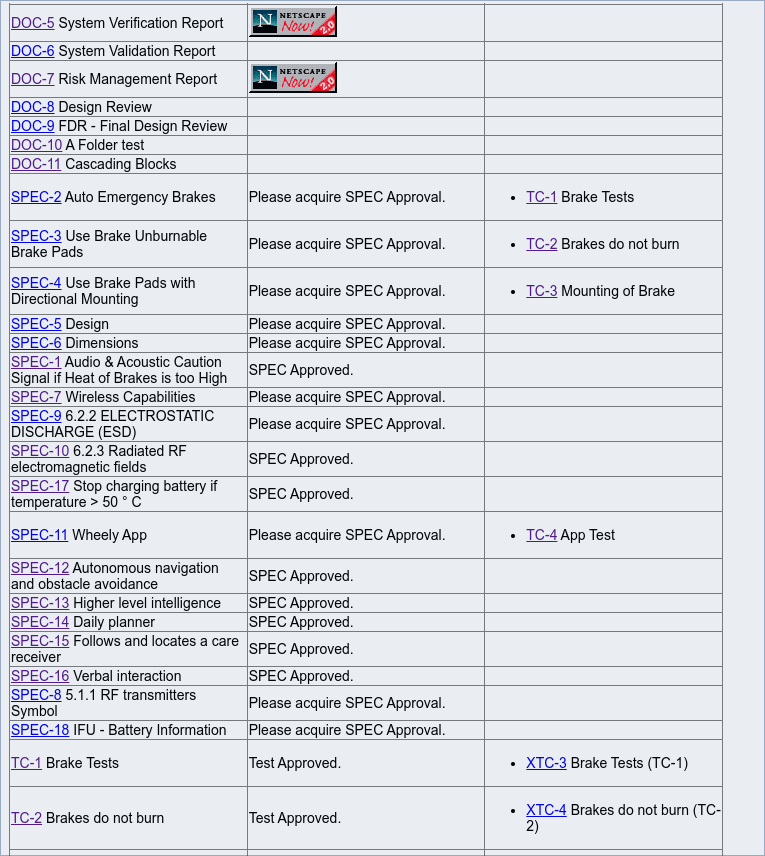
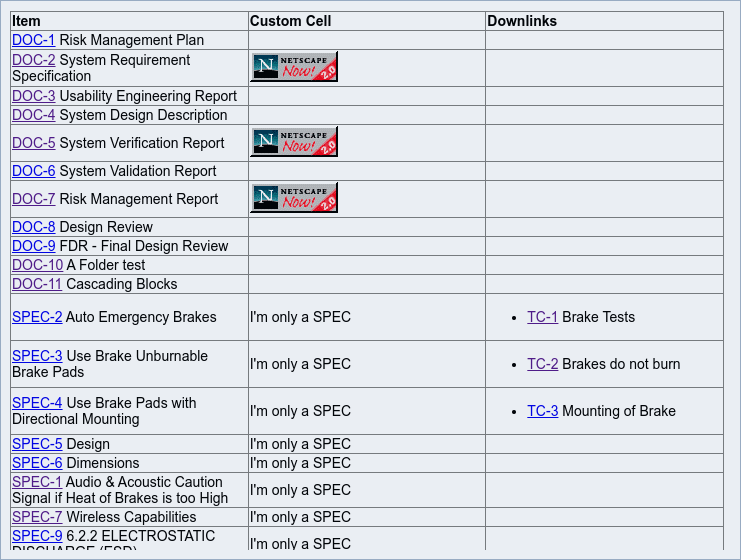
Here is a picture of the result, with the first column being the item id and title, the second is the custom text or image, and third are the downlinks from the item:
The PRINT project has a feature that makes this easy. We call it Cascading Blocks. The idea is to concatenate one block per category into one of the table cells. By limiting when each block prints, we ensure that only one of the blocks prints output. Let’s set this up.
Note on working with these example
The easiest way to experiment with Formatters is to have two windows of Matrix open, with the a Document in one and the PRINT project in the other. Set up the Document with a Data Section, go into the layout dialog and select the new formatter.
You can now preview the formatter every time you save it, making it very fast to iterate over settings.
Pre-work
I’ve annotated the WHEELY demo project with the labels mentioned above. If you don’t have access to that, then any project with at least three categories of items will do.
First, an OR label called WebReady, applicable only to category DOC
Second, a design label “TC Approved,” applicable to category TC
Third, a design label “SPEC Approved,” applicable to category SPEC
Set the labels on a variety of DOC, TC and SPEC items in the database so you have something to see as you build the custom table in the PRINT project.
Now, create a document with a custom section and select the DOC, TC and SPEC folders as the Main Items.
Basic setup
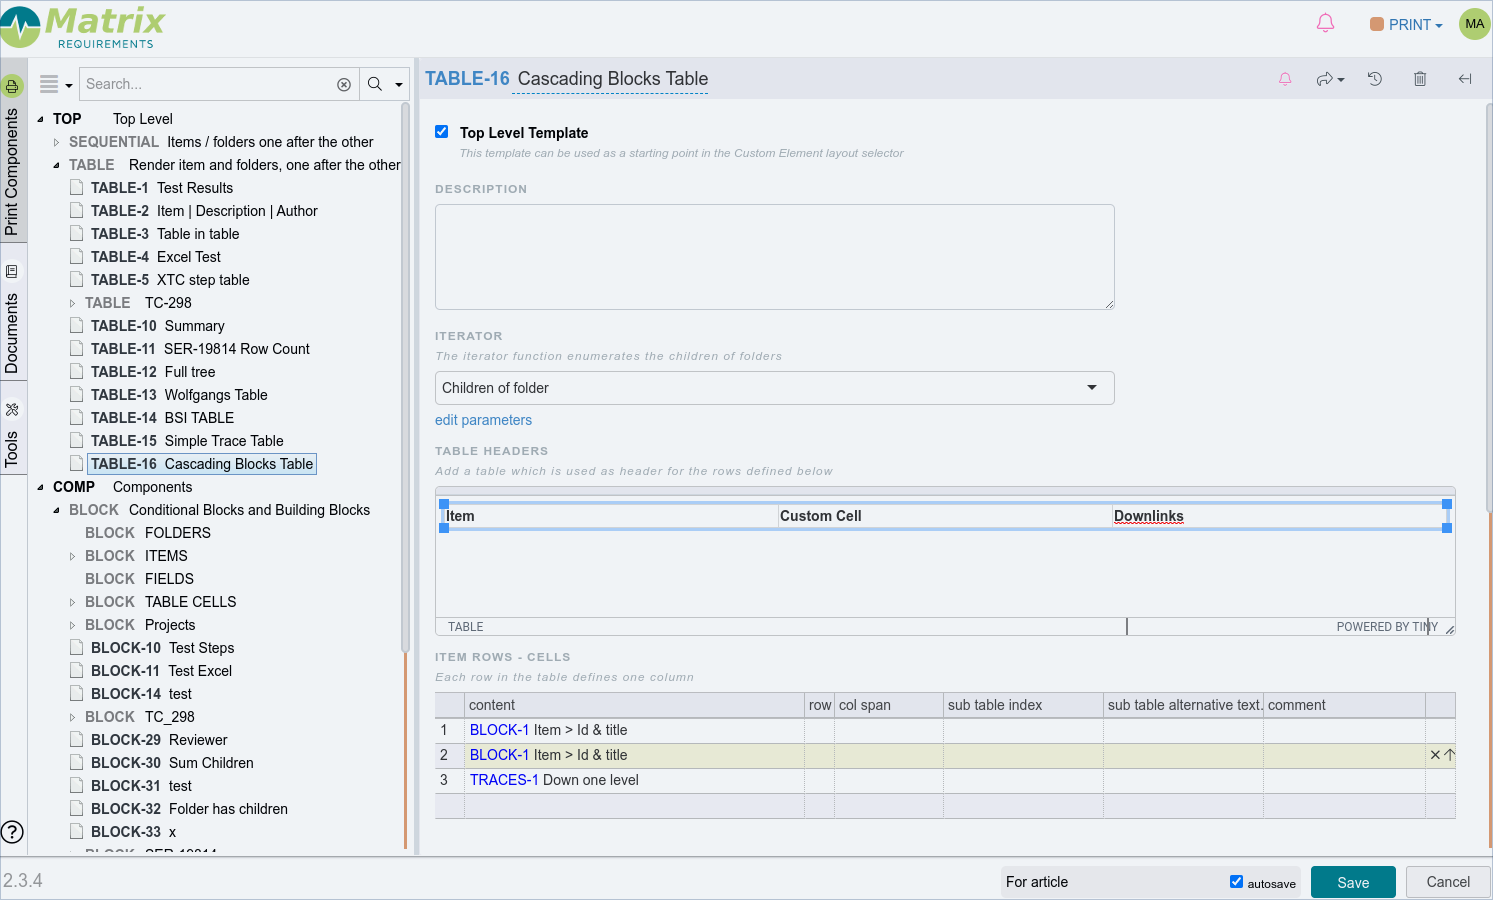
Open the print project and create a top level table with 3 columns:
First column “Item”. Set this to print BLOCK-1 in the cell.
Second column “Custom Cell.” For now, set this to print BLOCK-1 in the cell (we will create a new block).
Third column “Downlinks.” Set this to print TRACES-1, which prints all the direct downlinks of the item.
It should look like this:
Save this, then reference it in the document you created in the Pre-work. You should see all of the DOCs, SPECs, and TCs in the wheely project printed, like so:

Structuring our blocks
Create a folder under blocks, I called mine “Cascading Blocks Example.” This is a good idea because we need to create several blocks.
First we need a block for the cell
Then, one block per category for which we have custom printing.
Finally, one block per category for each different kind of printout we want depending on labels or other variables.
We’ll end up with a tree structure of blocks like this (source):
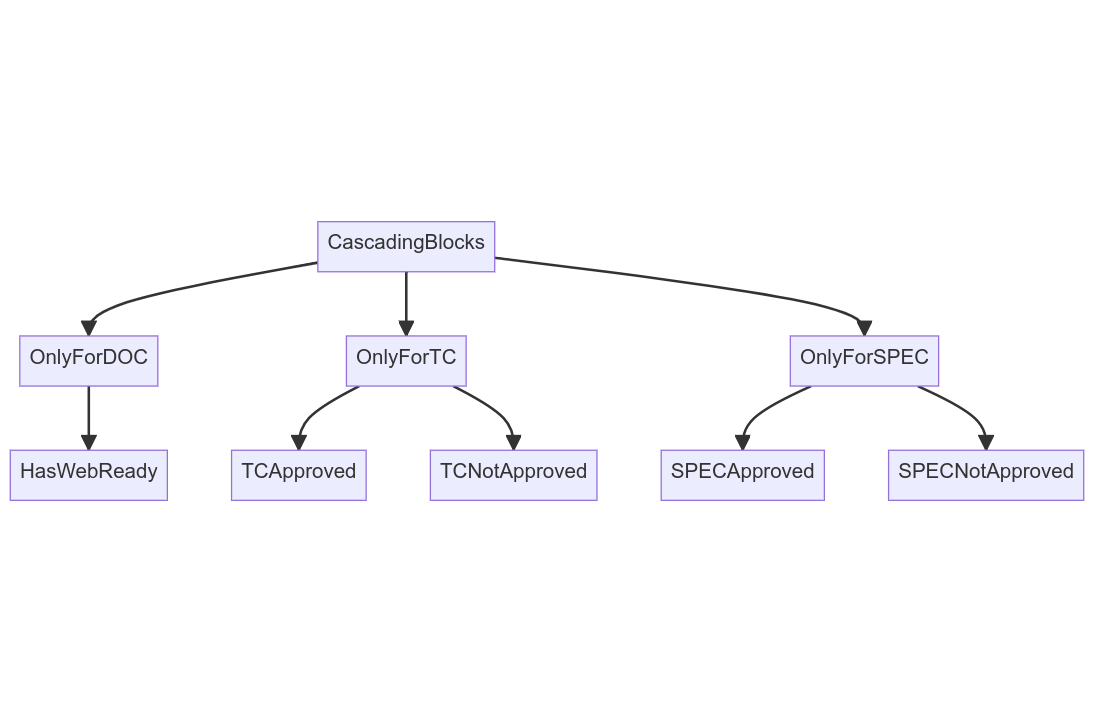
First create an ordinary BLOCK with no condition and call it “CascadingBlocks.”
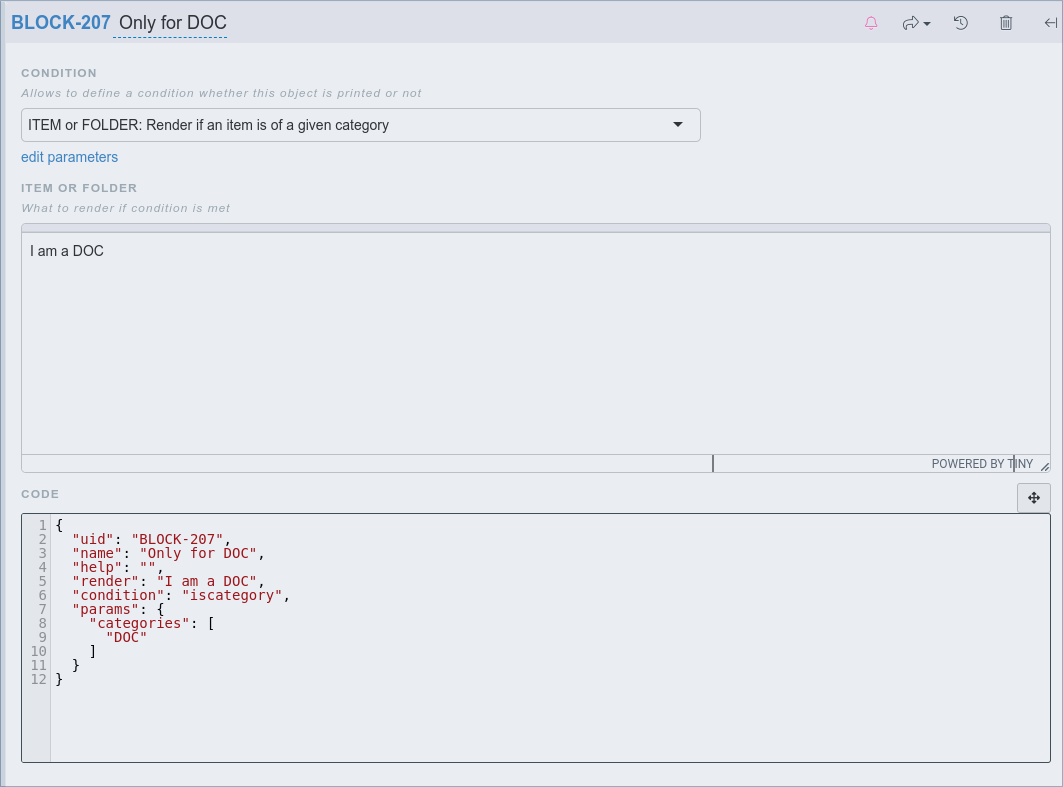
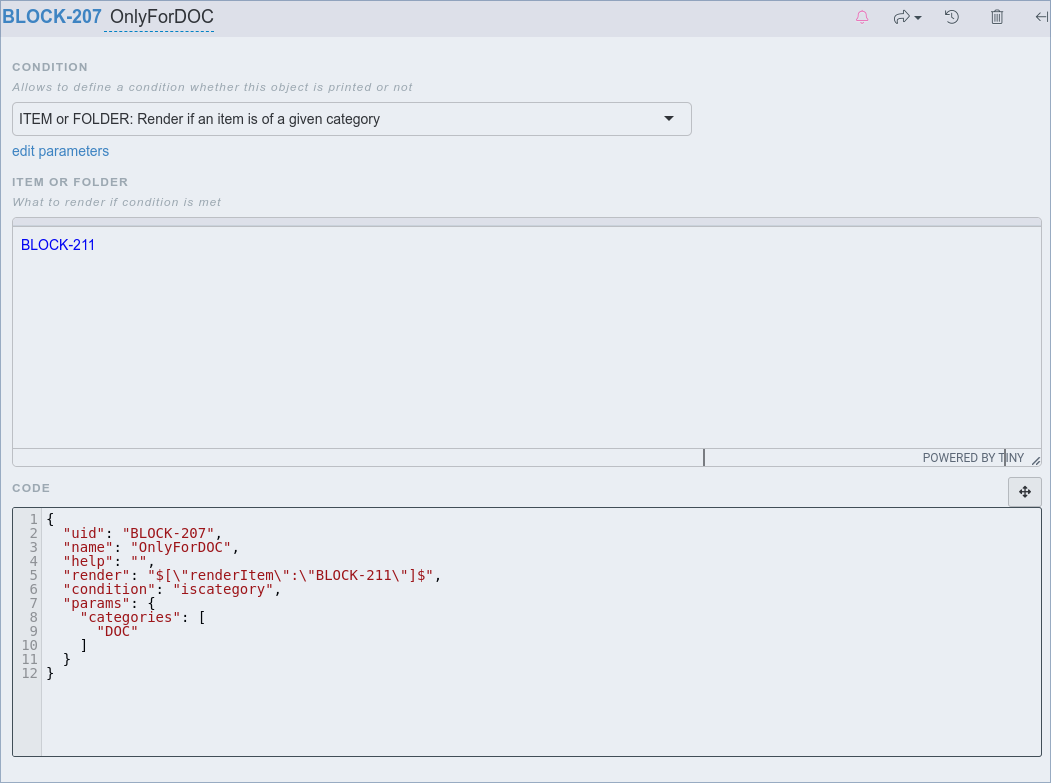
Then create a BLOCK called “OnlyForDOC” with the condition “ITEM or FOLDER: Render if an item is of a given category.” You need to edit the parameters and do some typing to limit the categories to DOC only. Here is what I typed:
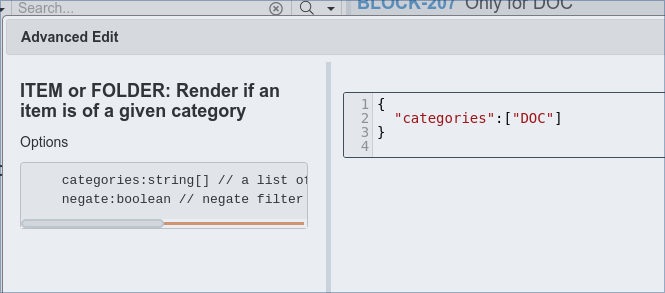
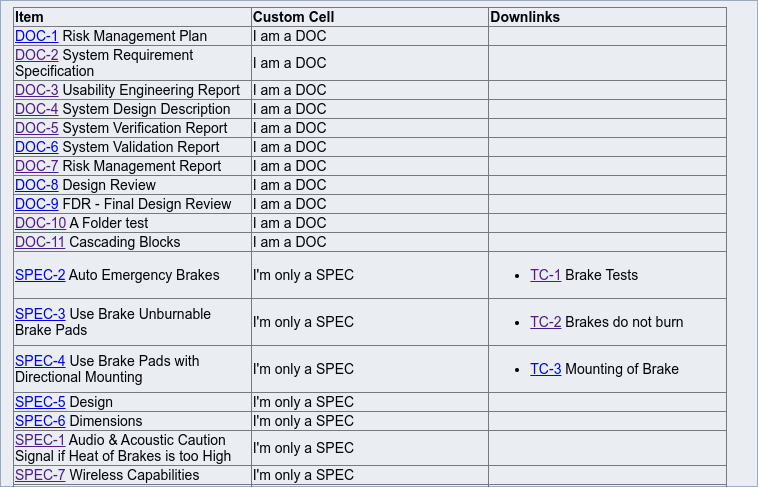
For now, just to test that things are working, enter “I am a DOC” in the “What to render” text box, like so:
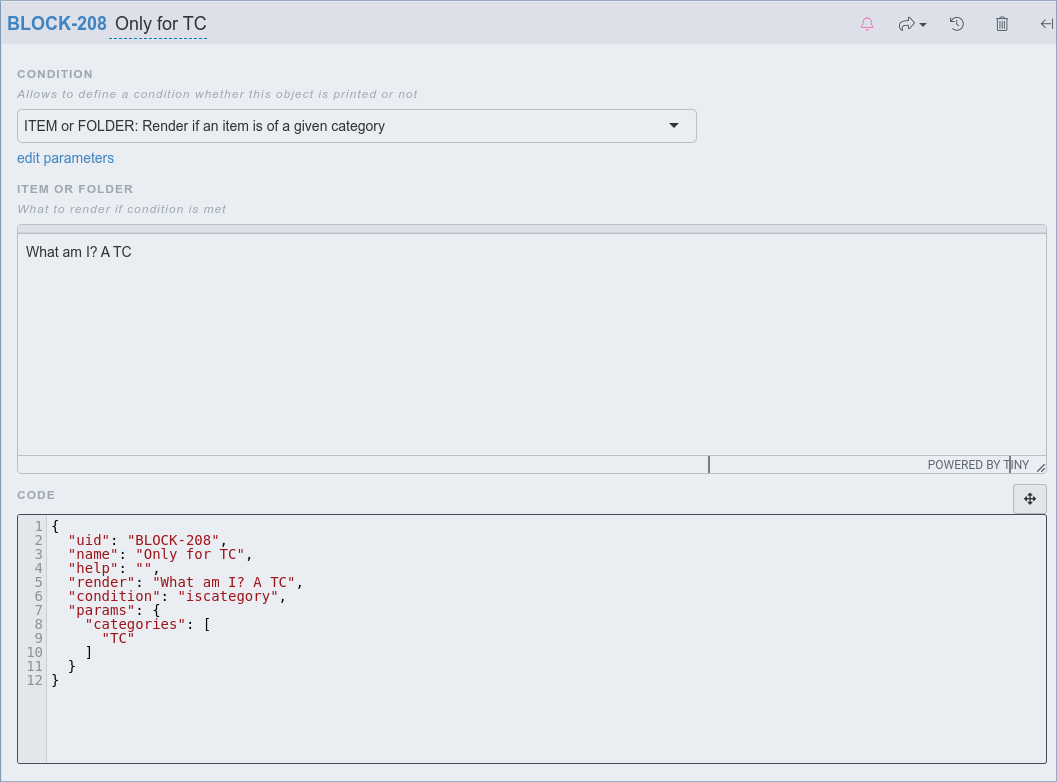
Create the same kind of block for TC. Include some simple text unique to TC like we did above:
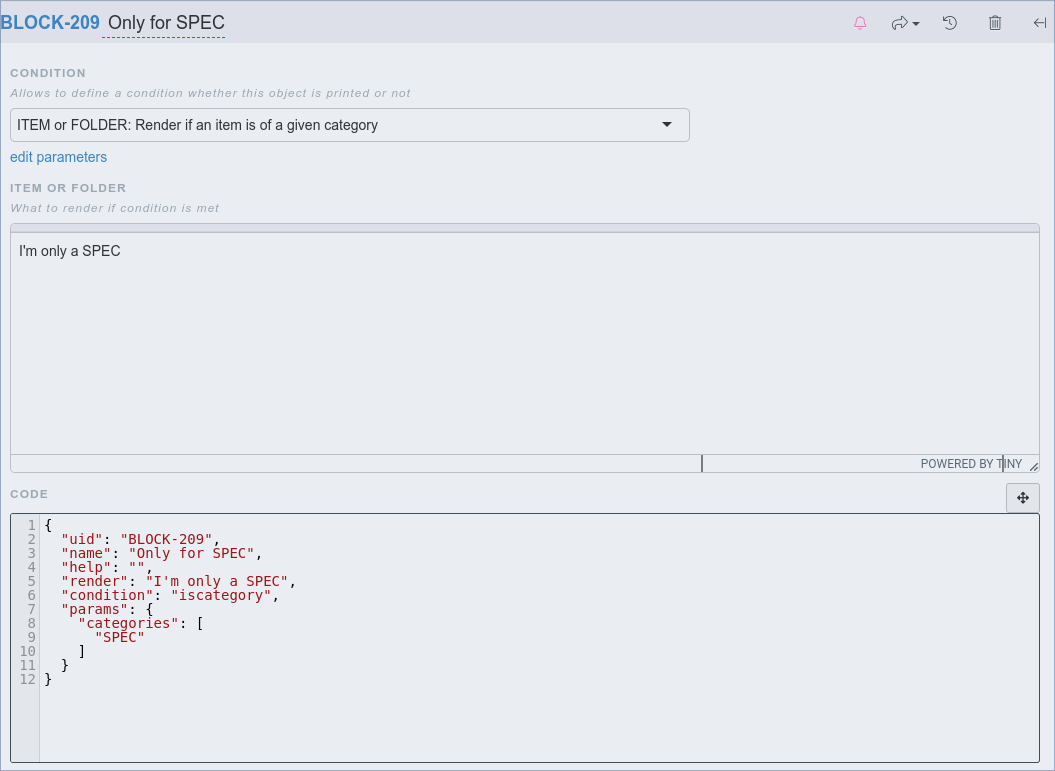
Do the same for SPEC, ending up with something like this:
Now, go back to the “CascadingBlocks” block, and simply type the BLOCK IDs for each of those three blocks you created in the “What to render” text box.

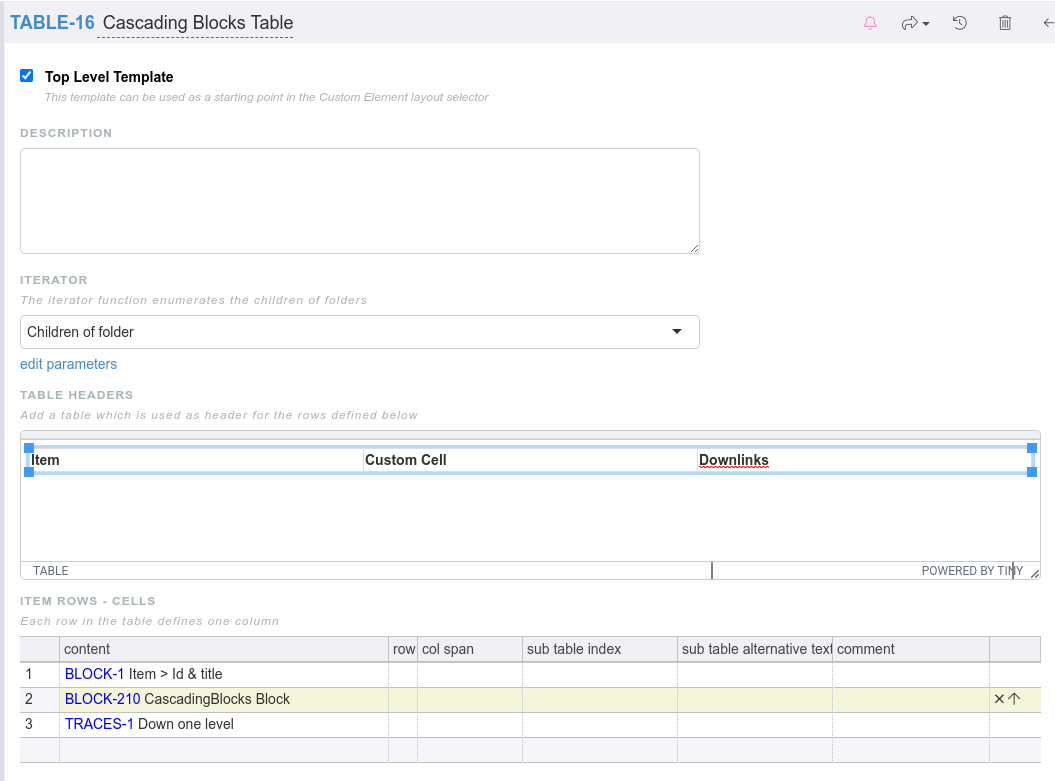
Go back to the table you created and for the second column, reference this block instead of BLOCK-1. In my case, I need to reference BLOCK-210:
Now that this is done, you can preview your document again. You’ll see your custom messages printed for each of DOC, TC and SPEC. This is already quite powerful. We called the feature Cascading Blocks for the simple reason that we reference several blocks right next to each other with the idea that only one will print something. Here is my result:
The DOC WebReady label
Our assignment is still a bit more complex. We need to create the bottom row of BLOCKs from the tree diagram above. These are the special blocks that do something specific if a label is present (or not).
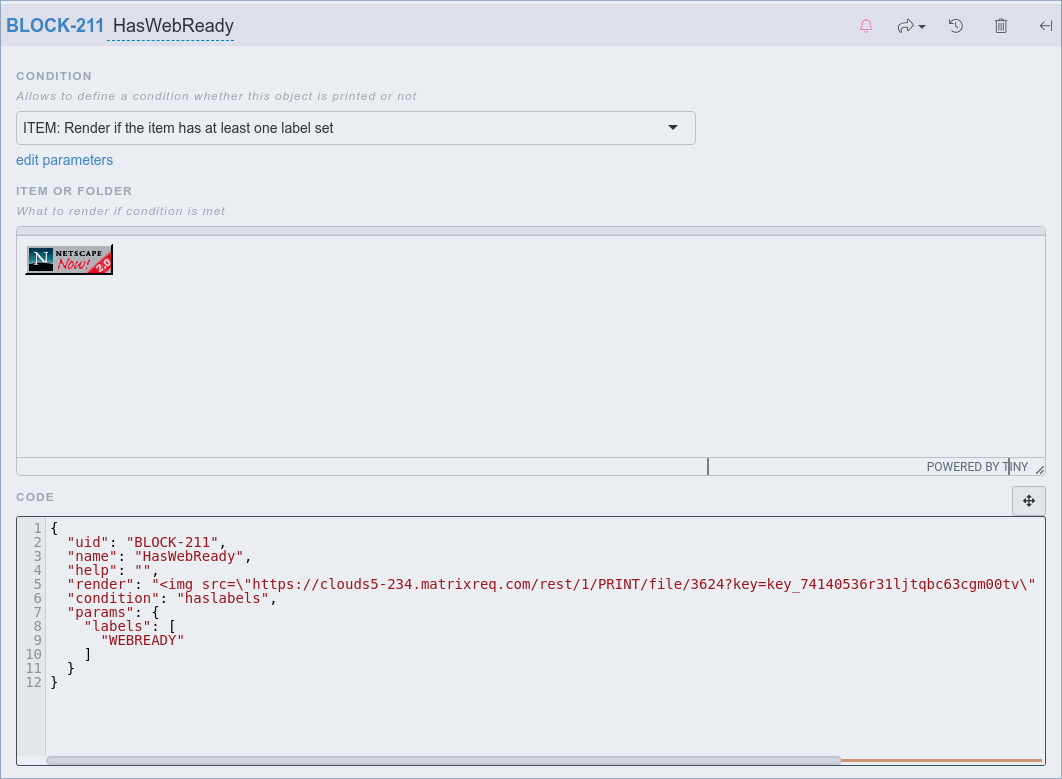
Let’s create the special DOC block first. I found a cute graphic to match the idea that the DOC is “WebReady.”

Create a block called HasWebReady with the condition “ITEM: Render if the item has at least one label set.” You’ll need to edit the label parameters to point to the WebReady label. Just paste the image above into the “What to render” rich text block, and rest assured that it will only display for DOCs that have the label set. Here is the new block:
Go back to your “OnlyForDOC” block and reference this new block like so:
If you preview the printout now, the results are pleasing:
The TC and SPEC labels
Create the TCApproved Block with the condition “ITEM: Render if the item has at least one label set.” Choose the label you created in the pre-work in the parameters for the block.
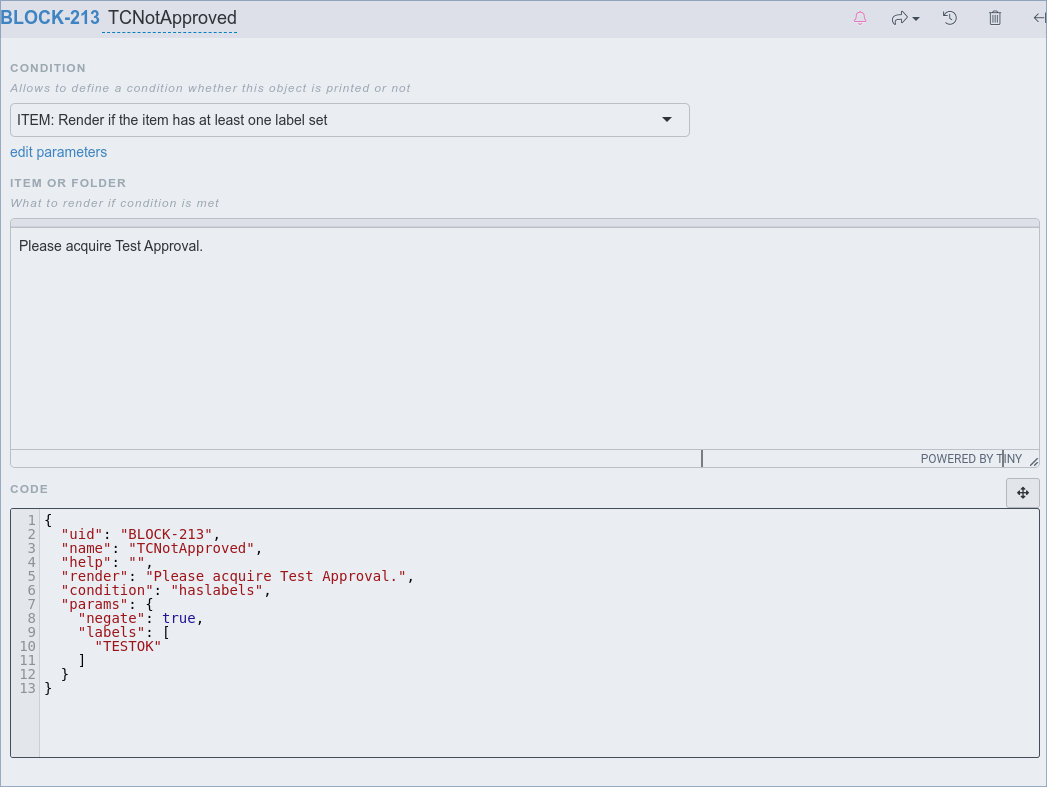
Create the TCNotApproved block similarly, but add the negate option, set to true in the block parameters. Here is the result for that one:
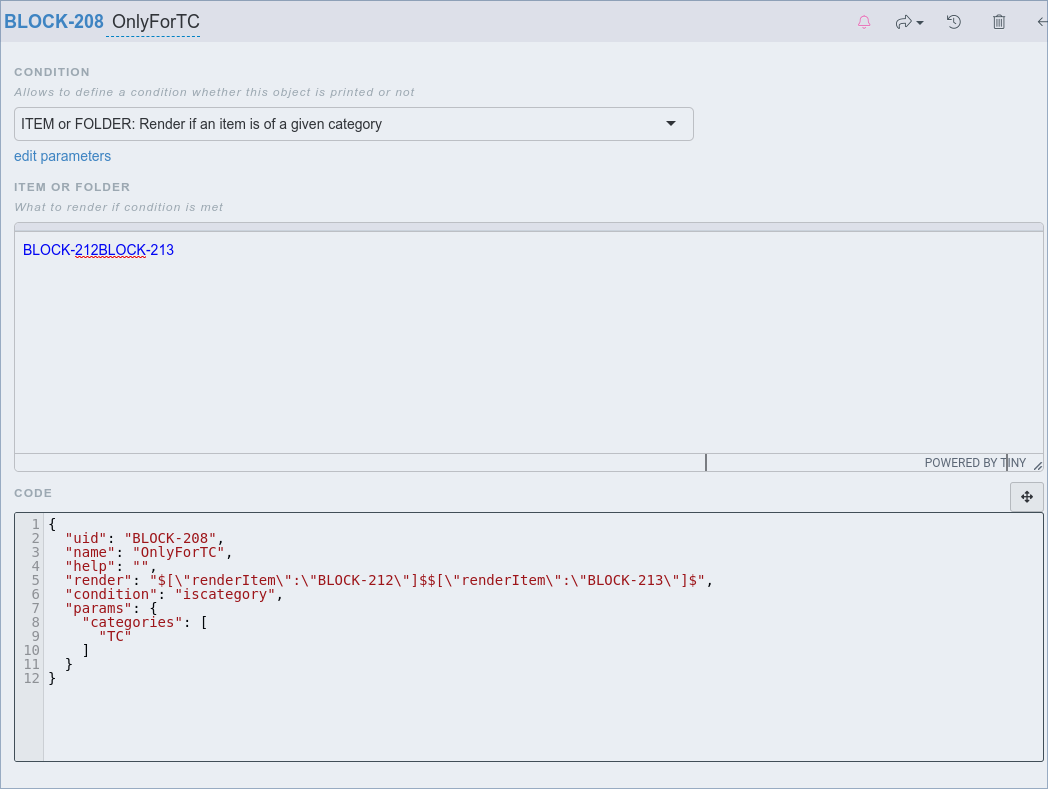
Go back to the OnlyForTC block you created earlier and replace the text with a “cascading block” of those two blocks you just created. On my system it looks like this:
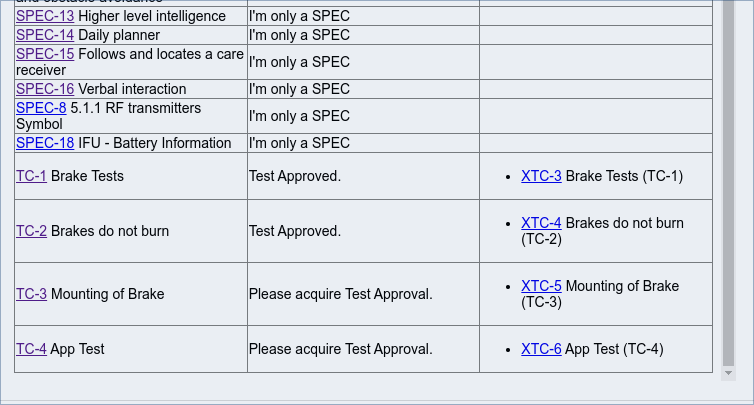
If you preview the print now, you’ll see the correct text displaying for TC items depending on whether or not the tests have passed the approval process:
Do the same for SPEC, which is exactly the same process as we just followed for TC. I’ll leave this to you to get some practice! Your end result should look like this:
Wrapping up
Revisiting the diagram above, you’ll notice that we could eliminate one block:

Since we don’t need to make any choices between alteratives for DOC, we could combine OnlyForDOC and it’s “child” block HasWebReady. This would be a good exercise for the reader. I hope this handy way to construct custom print logic for different item categories proves useful.